- 1. Simply click install.
- 2. Then create the Amazon Translate project – this takes around 5 minutes
- 3. If you already have an AWS account skip this step. If you do not have an AWS account yet, sign up for free first. Click on the following AWS account
- 4. Then open this link AWS IAM Login
- 5. Then click on APIs & Services
- 6. On the left click on ‘Users’
- 7. Click on ‘Add user’
- 8. Put as ‘User name’ zendesk_translate
- 9. Check ‘Programmatic Access’

- 10. Click ‘Next:Permissions’
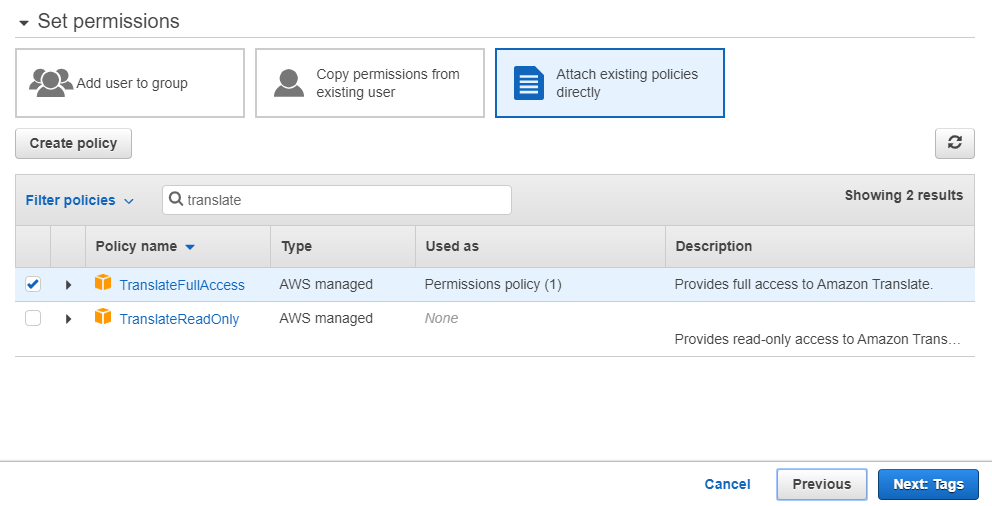
- 11. Click on ‘Attach existing policies directly’
- 12. In the Search field write ‘translate’
- 13. Check ‘TranslateFullAccess’

- 14. Click on ‘Next: Tags’
- 15. Click on ‘Next: Review’
- 16. Click on ‘Show’ Secret Access key
- 17. Copy the Access key ID & the Secret Access key and put it in the setting of the Zendesk Chat Amazon AWS Translate App

- 18. “Allowed Languages”:
Please add the languages you want to be available for translation in the following format format using ISO 639-1 codes from: https://en.wikipedia.org/wiki/ListofISO639-1codes e.g. ‘de’ => ‘German’, ‘it’ => ‘Italian’
- 19. If you are on the Growth, Professional and Enterprise, make sure you also enable these languages in https://your-domain.zendesk.com/agent/admin/account => Localization => Additional Languages.
- 20. “Agent working language”:
The language customer tickets should be translated to – this is your language/the language you are working in.
Allowed language codes can be found here (use the 2 letter code ONLY): https://docs.aws.amazon.com/translate/latest/dg/what-is.html
- 21. “Agent working language is agent locale” checkbox:
If you have agents speaking different languages, check this if the customer tickets should be translated to the current agent’s language. - Now the app is ready to use